This is a bulletin board I made with m toddler class just before I quit working when I was pregnant with Honeybun. It was one of my favorite cumulative projects I did with any of my preschool classes, ever. The projects are all super easy, don’t use a lot of materials and can be completed individually or you can make the whole under the sea art-scape.
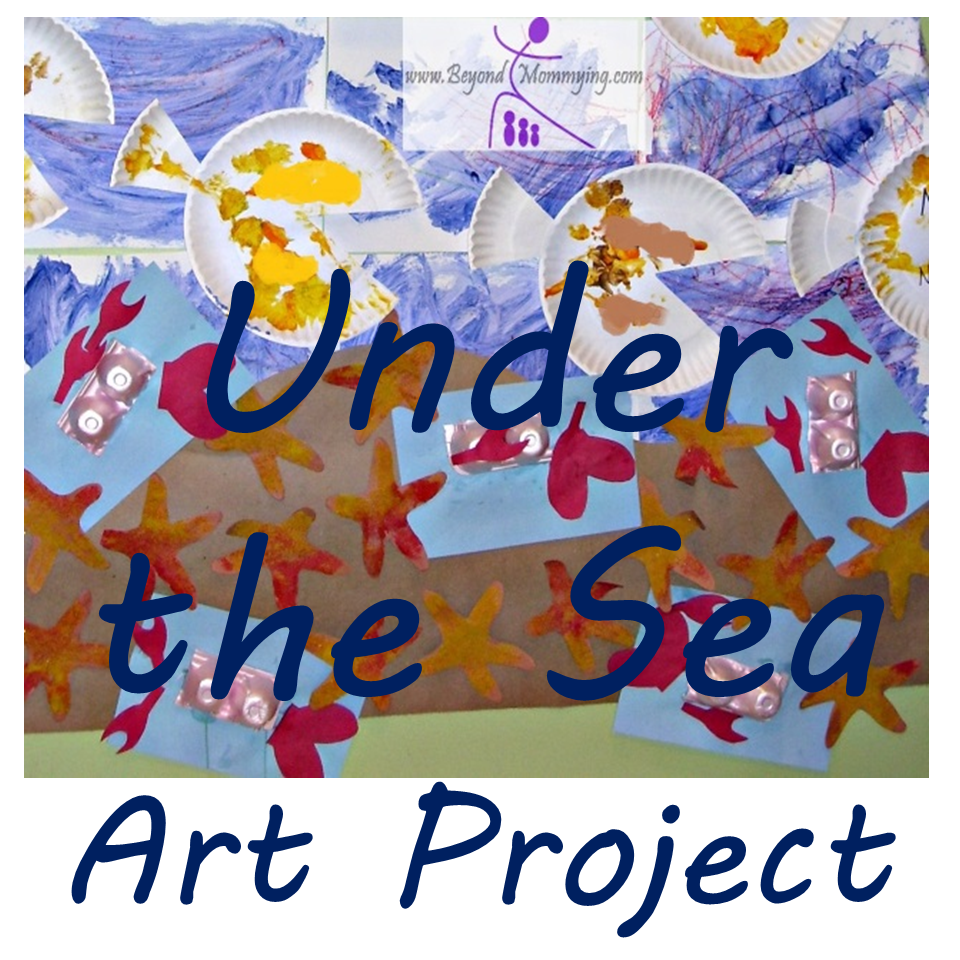
1. Under Water Background Pages
- Have children color on a piece of white paper (you can use standard size if doing the full project with multiple children or a larger piece of just doing with one child to make the ocean water background) with crayons (we used red to simulate coral but you can also use white, grays and blues to simulate waves).
- Once done coloring, have them paint over the top with a large paintbrush and blue watercolor paints or watered down blue tempera paint
2. Starfish
- Use diecut starfish or cut out starfish found in my Sea Creature Patterns (older children can cut their own patterns)
- Have children paint white liquid glue all over their starfish using a large paintbrush
- Dump some sand (can be colored craft sand or real beach sand) into a pie plate and have the child put the starfish glue side down in the sand and move around until covered in sand.
3. Paper Plate Fish
- Cut a small triangle out of one side of the paper plate.
- Glue the triangle (facing the same way) to the opposite side of the plate.
- Have the child decorate the fish however they choose with paint, crayons, markers or sequins for a Rainbow Fish.
*NOTE: Make sure to cut and assemble the fish BEFORE the child decorates it, you never want to cut a child’s work after they have completed it.
4. Egg Crate Lobsters
- If possible, find a pink egg crate and cut it into two-egg sections (or have your child paint a cardboard crate red with tempera paint)
- Cut out the tail and pinchers found in the Sea Creature Patterns out of red paper (older children can cut their own patterns)
- Give each child a 1/2 size piece of blue paper, 1 egg crate piece, 1 tail, two pinchers and two googly eyes (optional).
- Have children paint white liquid glue all over their blue paper using a large paintbrush
- Let children place lobster pieces on the blue paper however they wish.
*NOTE: I don’t recommend showing children a finished product as this can create unrealistic expectations. Instead, simply tell them you’re making a lobster and if children are unfamiliar with what a lobster is, show them a photograph or picture in a familiar book (For more on why, see Pinterest UnPerfect)
Putting together the Under the Sea Art Board Display:
- Put the watercolor painted pages at the top of the display area (put side by side if using multiple children’s pieces).
- Cut a piece of brown butcher paper or a brown paper bag with large wavy lines on the top and attach to the bottom of the display area for the sandy ocean floor.
- Place paper plate fish in the water, as if swimming.
- Place starfish and lobsters on the sandy floor.
This post is part of my Arts in April series, this month’s Monthly Milestone.