 Happy World Ballet Day! Most of you know that ballet is close to my heart. I’m a dancer, teacher and choreographer but you may not know that I’ve also been a costume maker. My specialty? Tutus.
It started when I was a senior in high school and my mommy was tasked with making 10 professional ballet tutus (the pancacke/platter/flat kind) for the ballet company I was in. So she and I spent every afternoon after school with the yards and yards of net, making tutus. That was the first tutu I ever wore and it was magical (and I still have it, it’s the one I’m wearing in many of the pictures in “Ballerina Mama: Moments in Pictures”). I also made a set of tutus for my students when I was teaching in Oklahoma.
 And now as a mommy to two little girls, you can only imagine the number of times I’ve been asked to buy them the tutus they see everywhere we go, but I have never given in! But that doesn’t mean my girls have a lack of tutus in their lives, in fact they have many!
I made them each one for dress-up using extra net/tulle I had where I just folded over the fabric, sewed a 1” seam at the fold and put a piece of elastic through. These are not the fanciest tutus, nor the “sticky-outiest” but they work just perfect for dress-up and playtime.
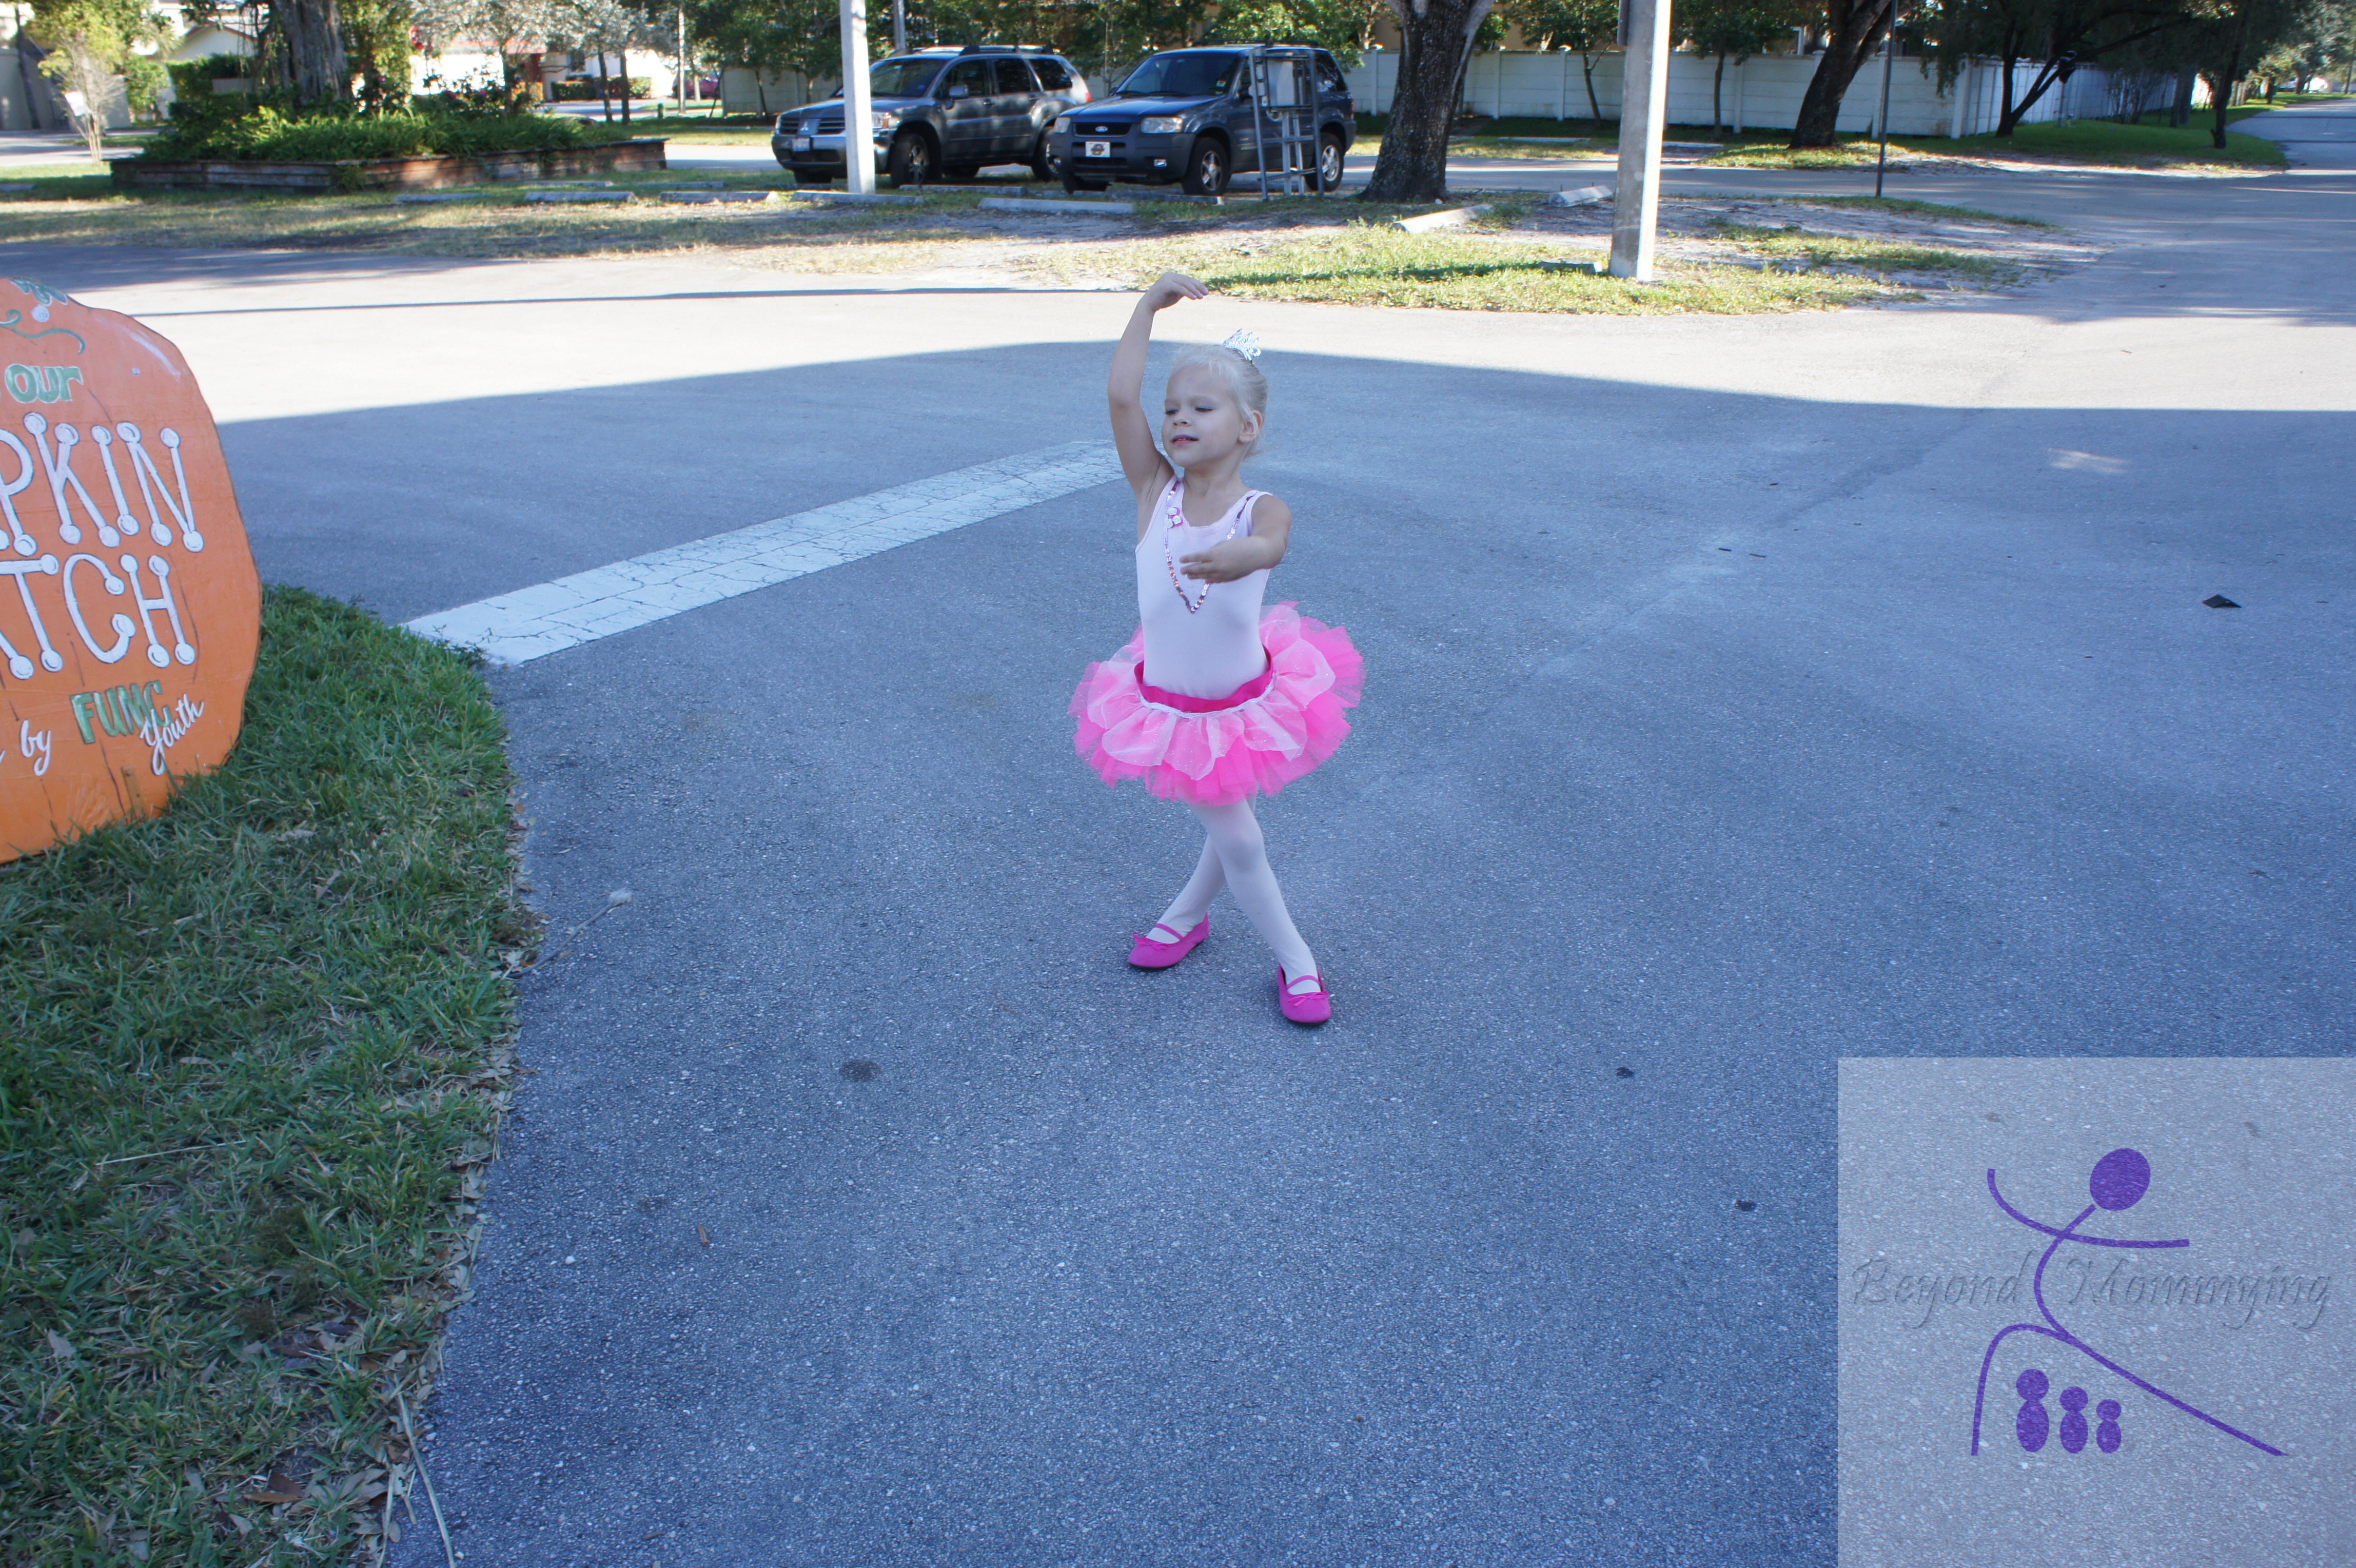
But when Honeybun wanted to be a funny dancing bunny for Halloween (in honor of the statue she was scared of near our home in Dublin), I decided she needed a proper tutu for her costume. She wore that tutu again the next year when she was a ballerina and there are rumors that Sugarplum might wear it this year too, so it’s definitely gotten it’s use even though I don’t let the girls play with it.
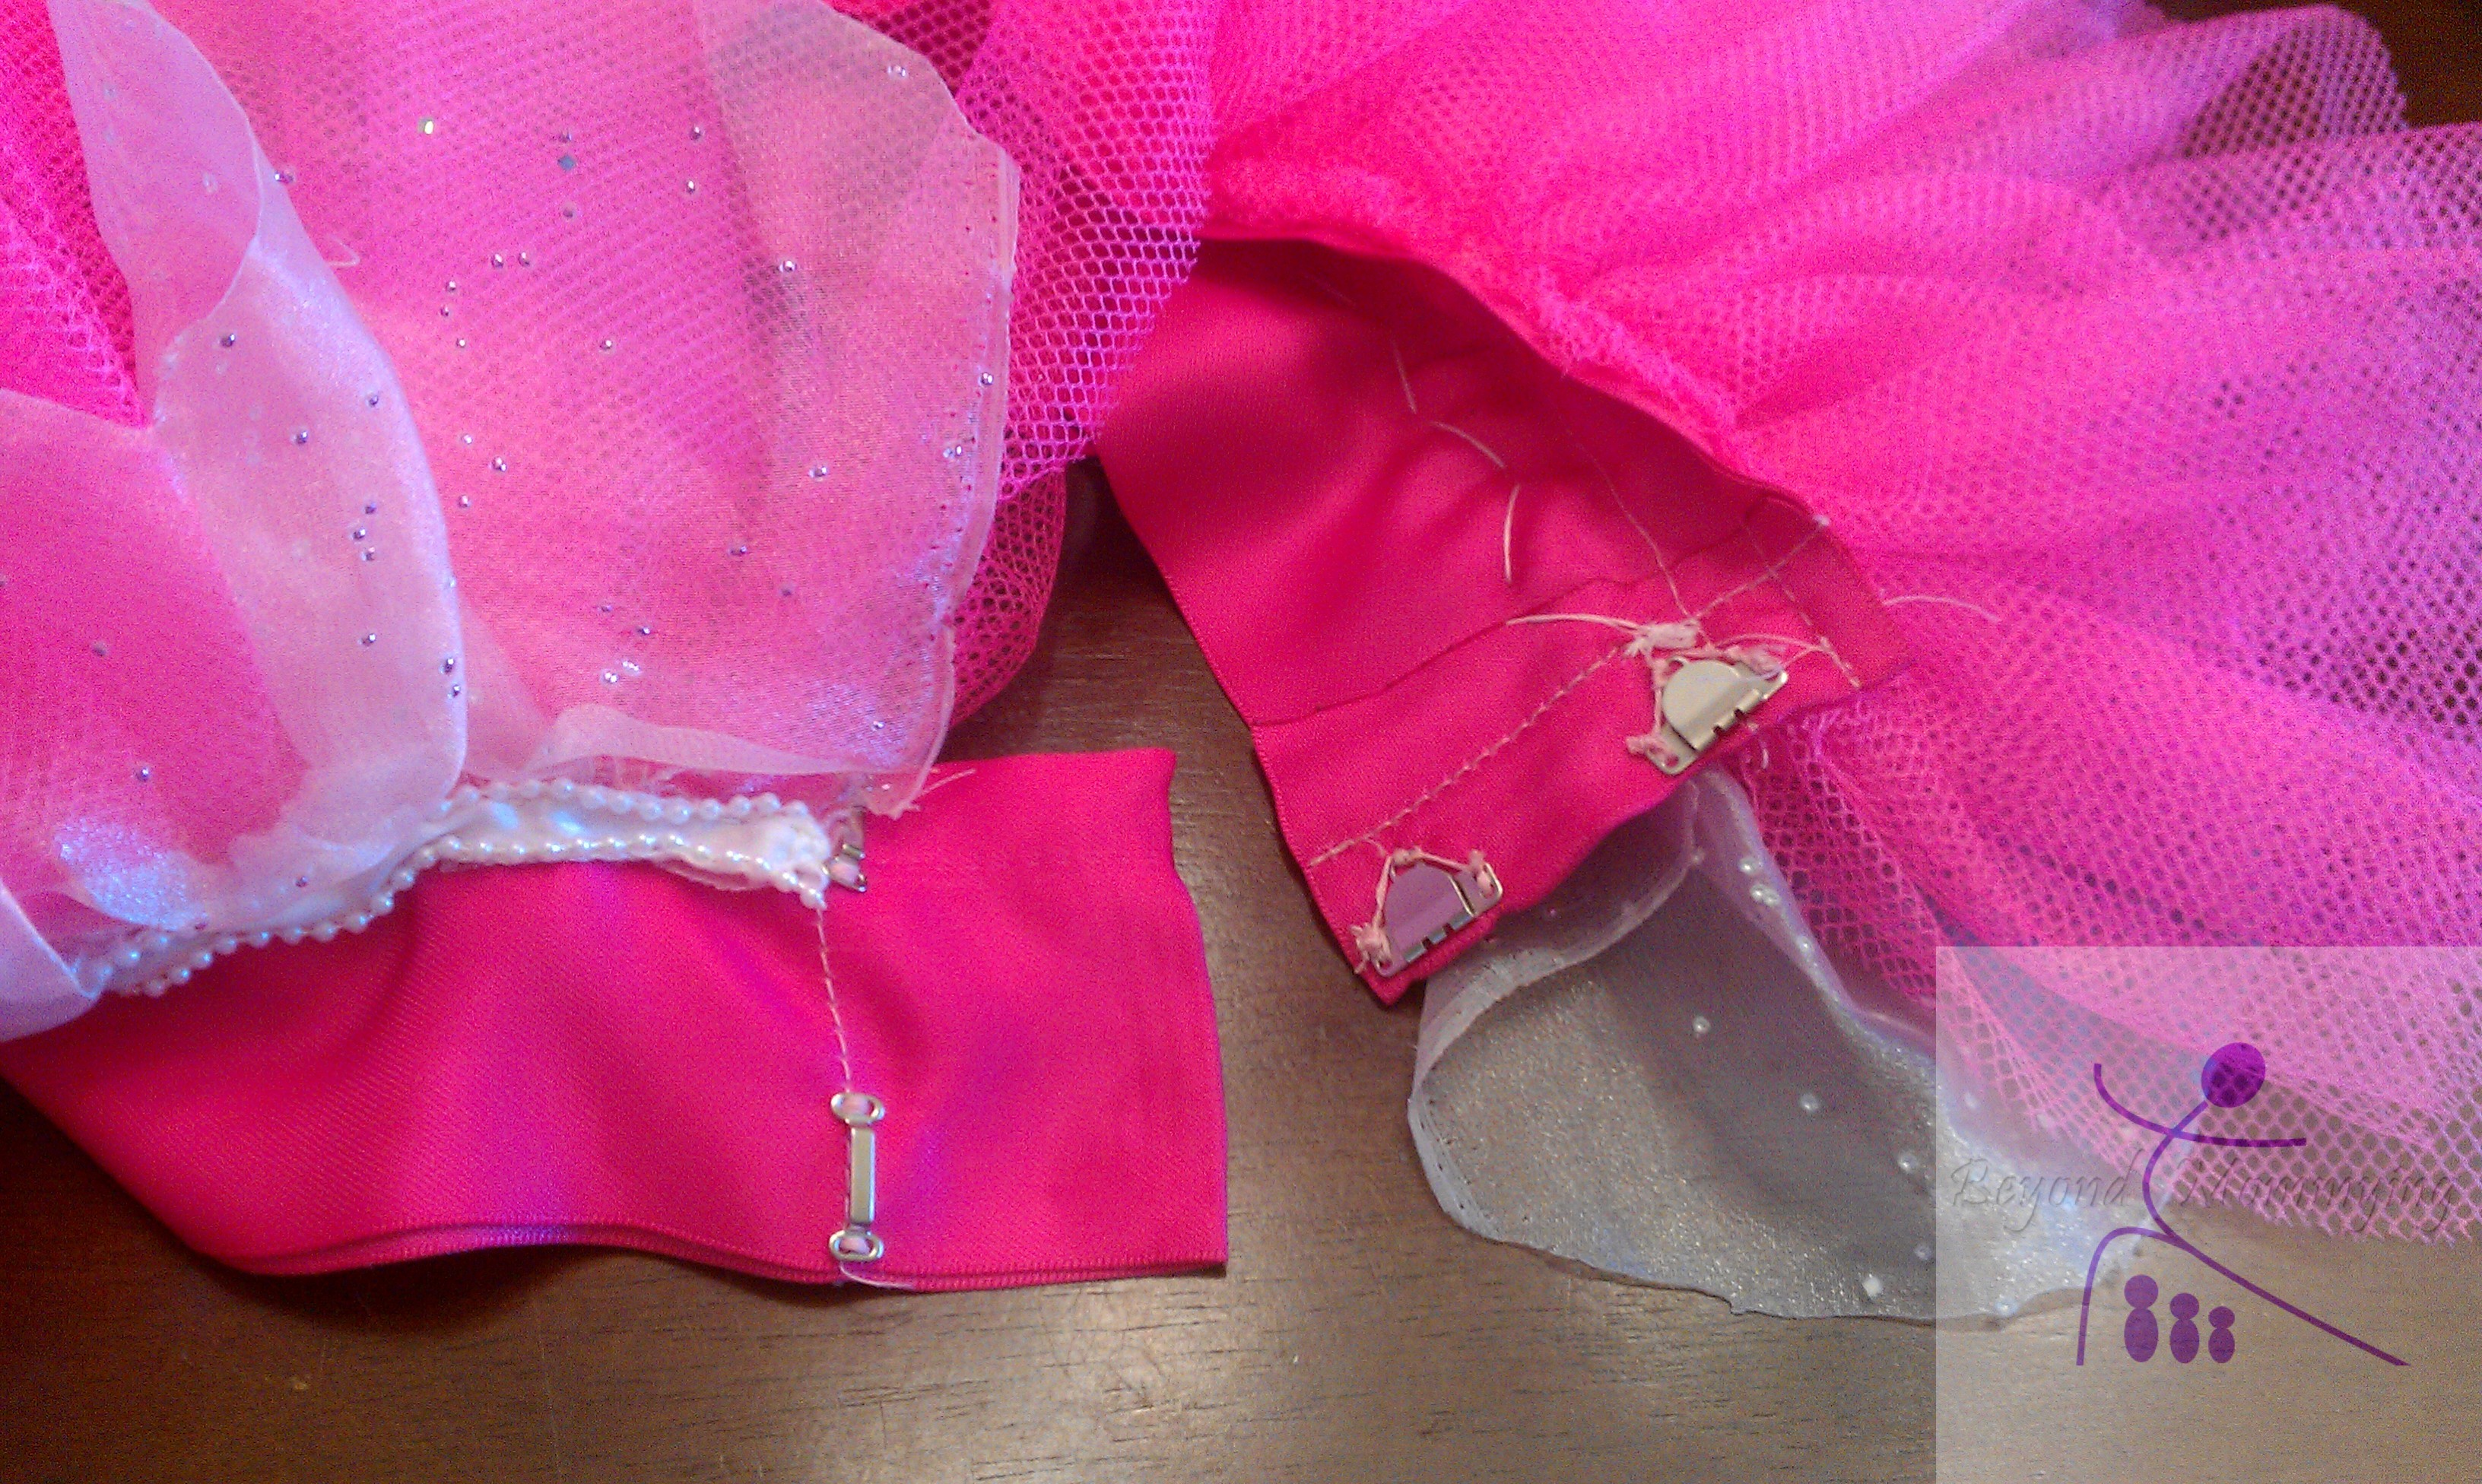
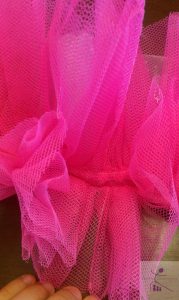
Here’s the secret to a make a tutu as beautiful as the pros wear: layers of different length net, attached to a basque (the torso piece of the tutu skirt—I used wide satin ribbon for Honeybun’s tutu), sewn upside down.
So here’s what you need for a “real” tutu for your little ballerina:
- 3 or 4”wide ribbon (2.5 times your child’s hip measurement)
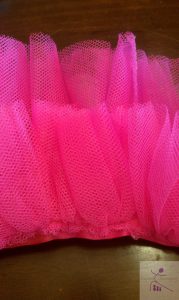
- 1 yard of net (net is sturdier than tulle to hold up the decoration but still has some weight so won’t “fly up” like tulle can)
- Decoration of your choice (trim, sequins, sheer over fabric, etc.)
And here’s how to make a tutu:
- Cut the net into strips (for Honeybun’s tutu at 3 years old, I did a 4” layer and a 6” layer. You can do longer for older kids, though my shortest friend in high school only had a 12” top layer). Cut 2-4 strips for each width (the more strips, the fluffier the tutu will be).
- Sew the strips that are the same width together end-to-end to make one looooong strip. Then sew two seams close to one edge of the strip all the way across (DO NOT reverse sew on either end to secure the seam. Also make sure the seams do not cross and DO NOT trim the threads, leave them long).
- Fold the ribbon in half and stitch the two lengths together about 1” from the fold. Measure your child’s waist and sew another seam that length plus 1-2” from the first seam (less if you want it tight, more if you want to have room to grow). Mark the middle between the two seams with a pin.
 With the edge where you sewed along the top of the net matching the edge of the ribbon, pin one end of the shorter strip of net at one of the seams you just sewed on the ribbon, pin the middle of the net to the middle point you marked on the ribbon and pin the other end of the net at the other seam.
- Pull ONE of the threads you left long on the net. The net should gather up, keep pulling until the net is the same length between the seams on the ribbon. Make sure the gathers are even along the ribbon and pin the rest of the length of net to the ribbon and sew it on.
 Repeat steps 4 and 5 for your second layer but sew it above the first layer with the edge of the net 1/2” or so from the first layer (it helps if you pin the first layer down to keep it from interfering as you attach the second layer)
- Cut the extra ribbon, leaving about 2”, and singe (burn with a lighter) the ends of the ribbon to keep it from fraying.
 Sew two eyes at the edge of the layers on the end you just trimmed and line up two hooks to match on the underside of the other end.
- Decorate as you wish! Add a trim above the top layer, some decorative fabric over the top (I used a sheer fabric that I cut to Honeybun’s waist length, folded in 8ths then used a bowl to cut the round edges. I then singed the edges of the fabric to keep it from fraying)
- Hook it on your little ballerina and watch her twirl with delight!